Are you considering giving your home a fresh new look with new flooring? DIY flooring installation might be the perfect solution for you.
In this article, we will explore the benefits of taking on this project yourself, the types of flooring that can be installed DIY, the tools and materials you will need, and the step-by-step process for a successful installation.
Whether you’re looking to save costs, have flexibility in design, or simply take pride in a job well done, DIY flooring installation has a lot to offer.
So, let’s get started!
What Is DIY Flooring Installation?
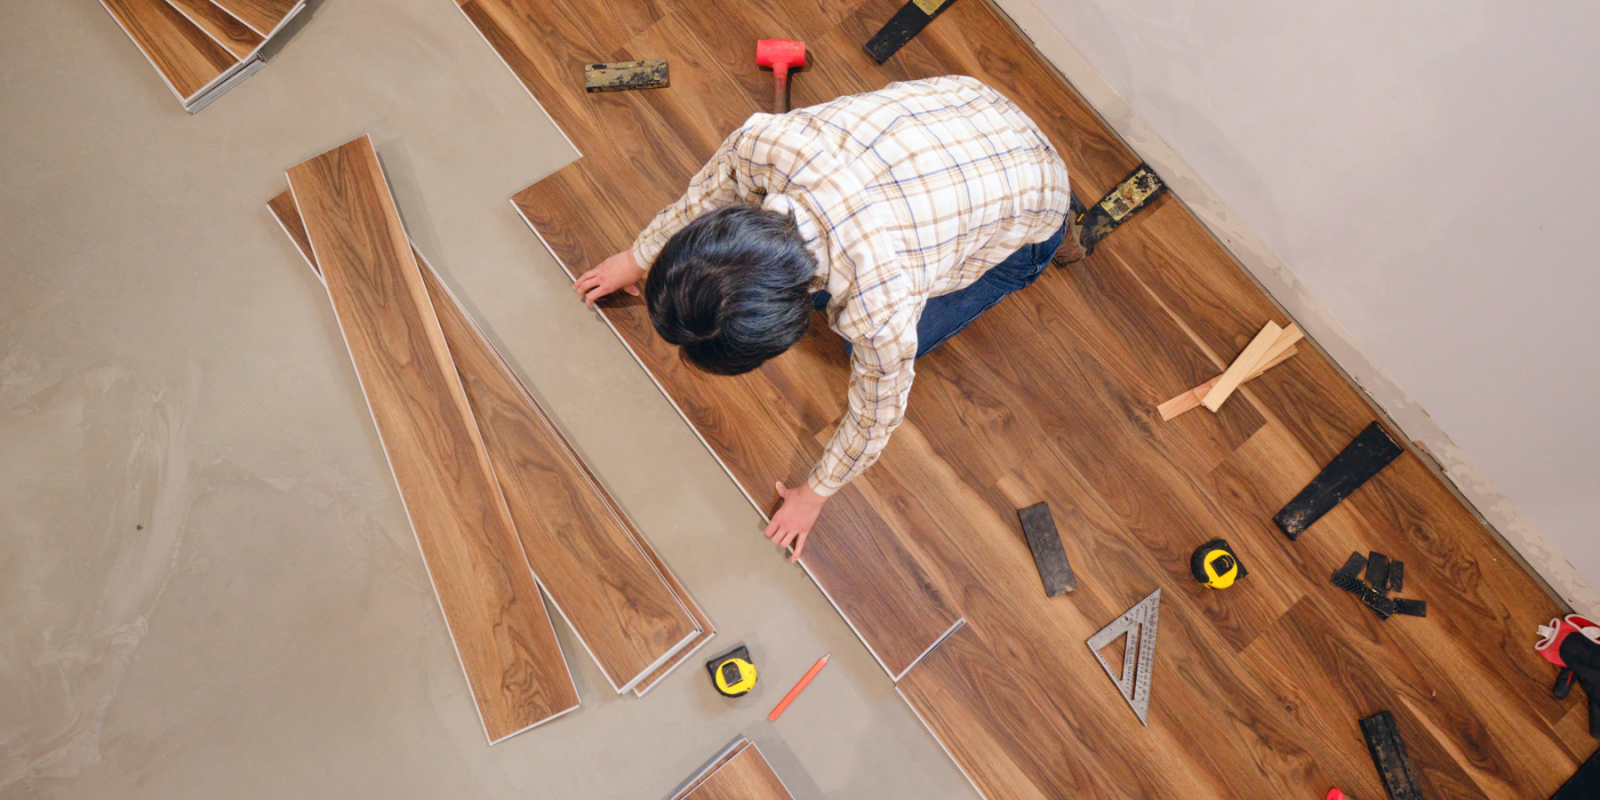
DIY flooring installation refers to the process of installing various types of flooring in a home or space using self-executed methods and techniques to achieve the desired results.
This method of home improvement has gained popularity due to its cost-effectiveness and the satisfaction of personal accomplishment.
When embarking on a DIY flooring project, it is crucial to consider the type of flooring material, whether it’s hardwood, laminate, vinyl, or tile, as each requires specific installation techniques.
Essential tips for successful installation include proper subfloor preparation, accurate measurements, and attention to detail.
Step-by-step procedures often involve tasks such as laying the underlayment, fitting the flooring material, and finishing with trim and molding for a polished look.
What Are The Benefits Of DIY Flooring Installation?
DIY flooring installation offers several benefits, including cost savings, flexibility in design and materials, as well as personal satisfaction and pride in the completed home improvement project.
By opting for a do-it-yourself approach, individuals can significantly reduce labor costs, making it an affordable option for many homeowners.
The freedom to choose from a wide range of materials and styles empowers individuals to create a flooring design that perfectly suits their preferences and enhances the overall aesthetic of their space.
This hands-on involvement also brings a sense of fulfillment, knowing that one has contributed to enhancing their living environment, which can be deeply rewarding.
Cost Savings
One of the primary benefits of DIY flooring installation is the potential for significant cost savings. This allows homeowners to manage their budget efficiently and explore affordable materials and techniques for the project.
Homeowners can save on labor costs by installing flooring themselves. This can make up a significant portion of the overall expenses. Choosing budget-friendly materials like laminate or vinyl can also reduce costs without sacrificing aesthetic appeal.
DIY enthusiasts can also use efficient techniques like floating floor installation or click-and-lock systems. These methods require minimal tools and expertise, making them ideal for cost-saving DIY flooring projects.
Flexibility in Design and Materials
DIY flooring installation offers homeowners the flexibility to choose from a wide range of flooring types, including hardwood, laminate, vinyl, tile, and carpet, allowing them to tailor the design and materials to their specific preferences and requirements.
This versatility in flooring options allows homeowners to find the perfect balance between aesthetics, durability, and functionality for different areas of their home.
Hardwood flooring exudes timeless elegance, laminate offers a cost-effective wood look, vinyl provides waterproof and easy-to-maintain options, while tile brings in a stylish and resilient choice, and carpet introduces warmth and comfort.
With DIY installation, homeowners can unleash their creativity and personalize each space with the perfect flooring solution, enhancing the overall ambiance and value of their home.
Personal Satisfaction and Pride
Engaging in DIY flooring installation can lead to personal satisfaction and pride, as homeowners take pride in contributing to their home improvement and renovation projects, creating a sense of accomplishment and ownership.
The process of selecting the perfect flooring materials, carefully planning the installation layout, and meticulously laying down each piece ignites a deep connection with the home.
As the project progresses, the homeowner witnesses the transformation of the space, fostering a profound sense of personal achievement and joy.
The ability to step back and admire the newly installed flooring, knowing it was their own effort that brought about this positive change, brings immeasurable pride and fulfillment.
What Are The Types Of Flooring That Can Be Installed DIY?
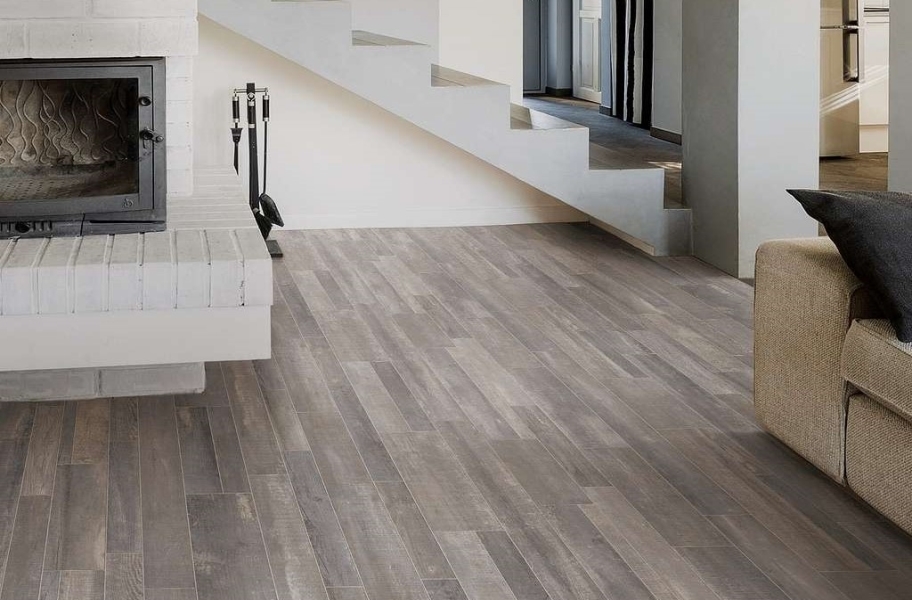
Several types of flooring can be installed using DIY methods, including hardwood, laminate, vinyl, tile, and carpet, offering homeowners a diverse range of options for their DIY flooring projects.
Hardwood flooring is a popular choice for its natural beauty and durability. It can add warmth and character to any space.
Laminate flooring, on the other hand, offers an affordable alternative that mimics the look of hardwood or tile. Vinyl flooring is known for its water resistance and low maintenance.
Tile flooring is versatile and available in various materials like ceramic, porcelain, and stone. Carpet is valued for its comfort and sound insulation.
Each type of flooring has its unique qualities and considerations for DIY installation.
Laminate Flooring
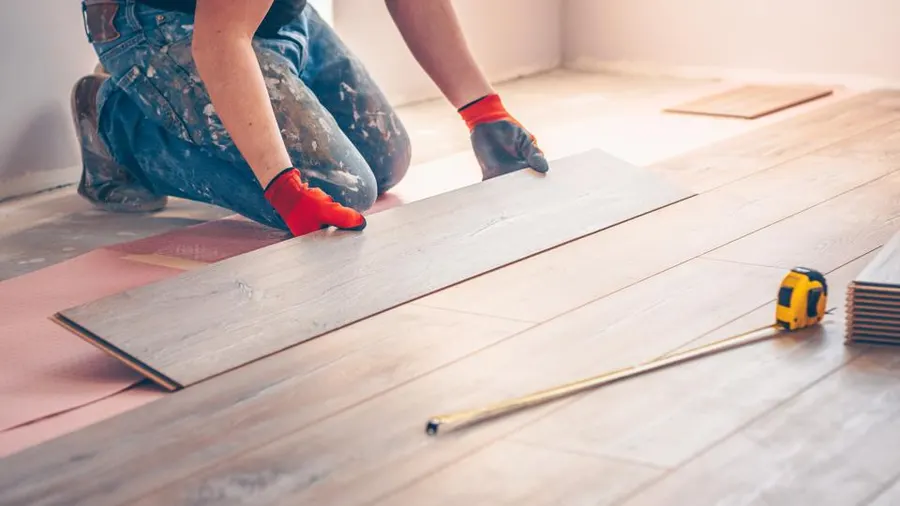
DIY installation of laminate flooring involves the process of laying the underlayment, preparing the subfloor, executing the installation, and implementing maintenance techniques to ensure the durability and aesthetic appeal of the flooring.
When preparing for the installation of laminate flooring, it is important to carefully select and properly install the underlayment. This will ensure a smooth surface for the flooring to be laid on. Subfloor preparation is a crucial step that involves checking for imperfections, leveling the surface, and addressing any moisture issues.
During the actual installation process, it is important to consider the specific type of laminate flooring being used. Methods such as click-lock or glue-down may be used, depending on the chosen flooring. To maintain the luster and longevity of the laminate flooring, regular cleaning and maintenance are essential. This includes using appropriate cleaning products and avoiding excessive water.

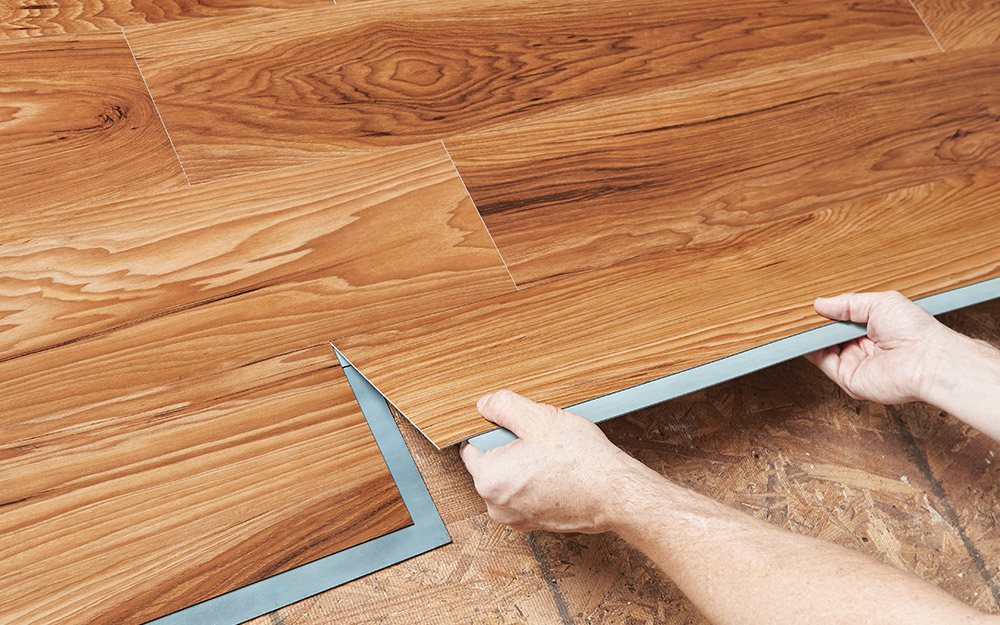
Vinyl Flooring
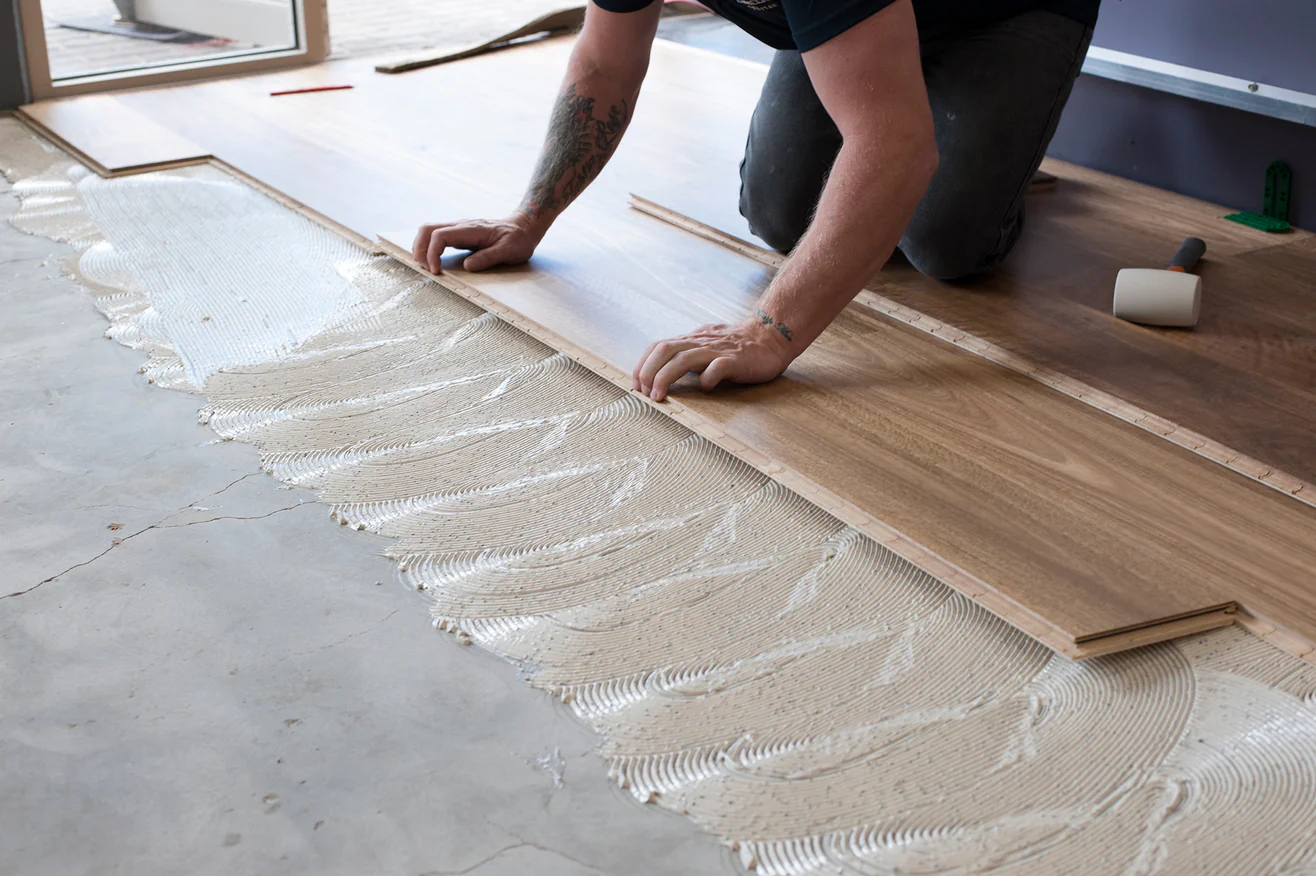
DIY installation of vinyl flooring involves the application of adhesive, laying the underlayment, preparing the subfloor, and executing finishing techniques to achieve a high-quality and durable vinyl floor.
Before installing vinyl flooring, it is important to prepare the subfloor. This involves cleaning and leveling the surface to ensure a smooth base for the vinyl. Once the subfloor is ready, follow the manufacturer’s instructions to apply a suitable adhesive for a secure bond.
After the adhesive has set, it is time to lay the underlayment. This layer provides cushioning and protects against moisture. Once the underlayment is in place, carefully place the vinyl tiles or sheets, making sure they are properly aligned.
To finish the installation, trim any excess material and add edge treatments for a polished look. This will not only enhance the appearance of the flooring but also help prevent any potential tripping hazards.
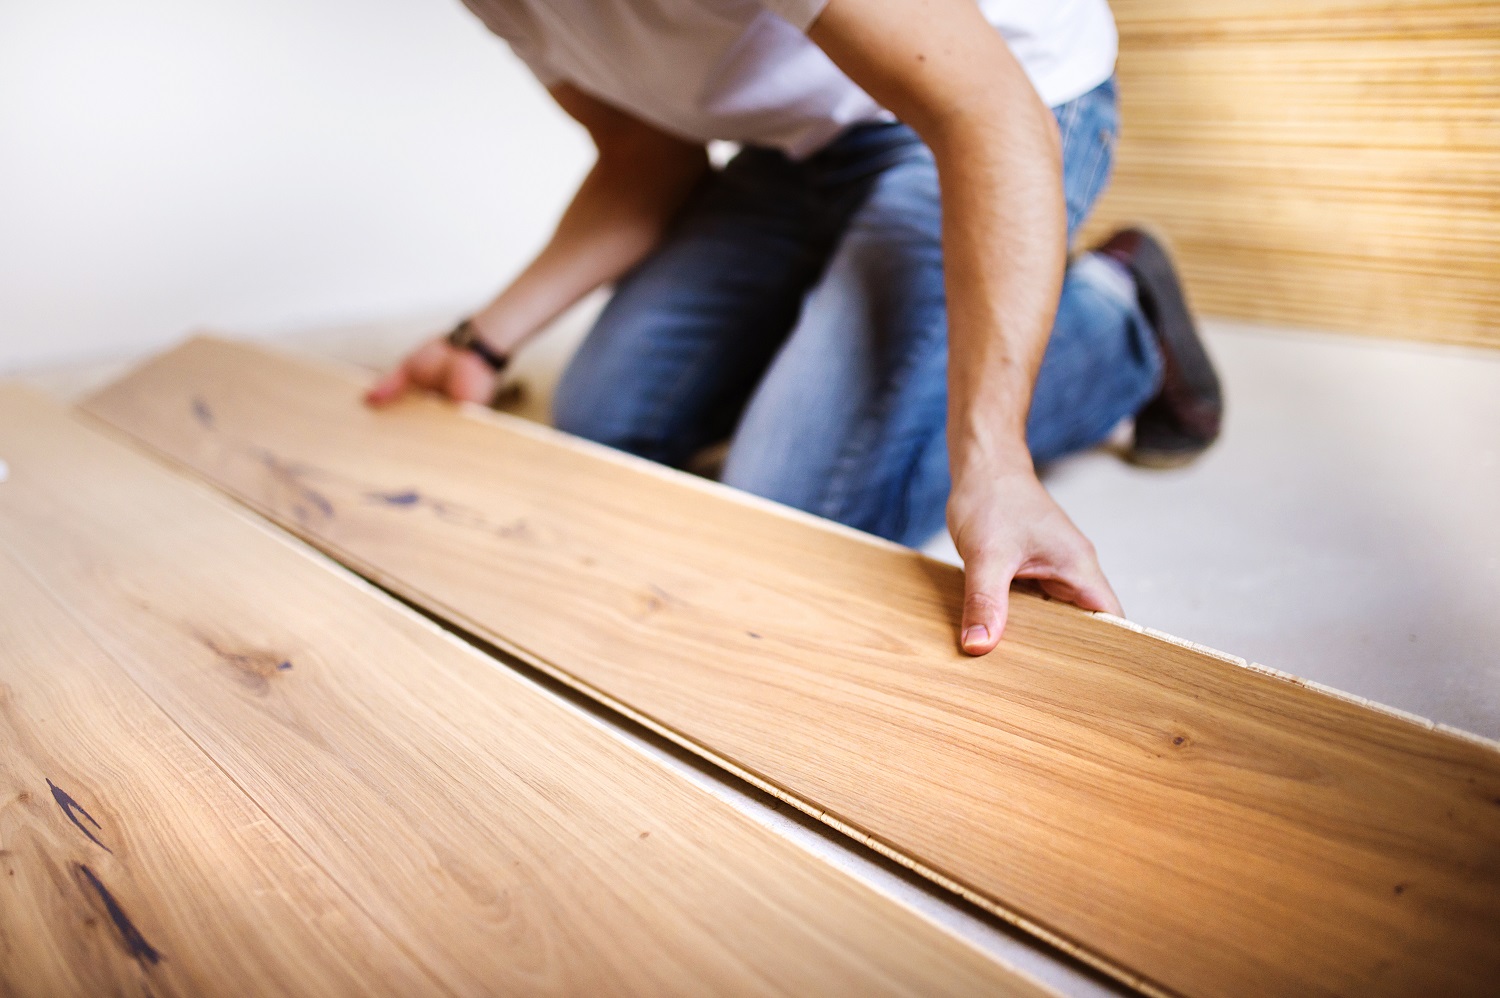
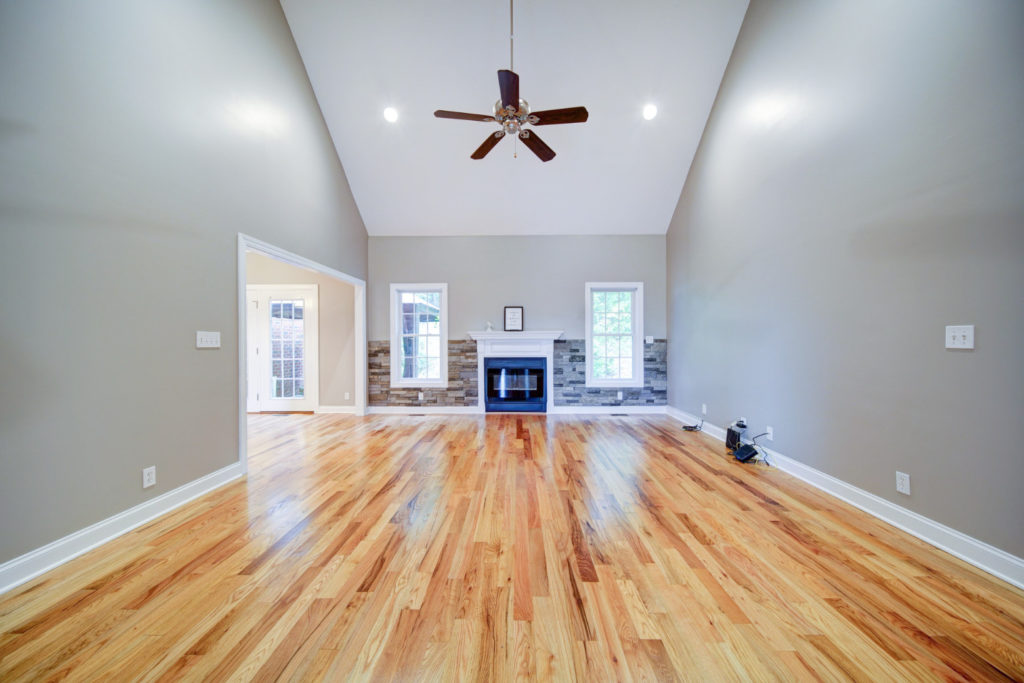
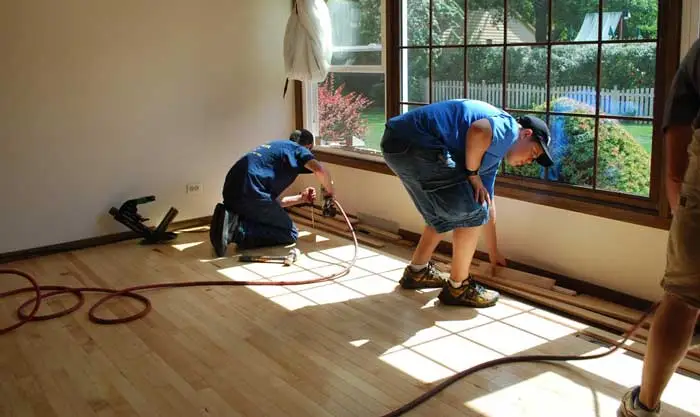
Hardwood Flooring
DIY installation of hardwood flooring involves securing the planks using nails or screws, implementing finishing touches, and conducting regular maintenance to preserve the quality, durability, and aesthetics of the hardwood floor.
When installing hardwood flooring, it’s important to carefully choose between nails or screws based on the subfloor material.
For a wooden subfloor, nails are typically used, whereas screws are preferred for concrete subfloors.
Once the planks are secured, finishing methods such as staining or sealing can enhance the appearance and protect the wood from moisture and wear.
Regular maintenance includes sweeping, vacuuming, and using recommended hardwood floor cleaners to keep the surface free from scratches and maintain its luster.
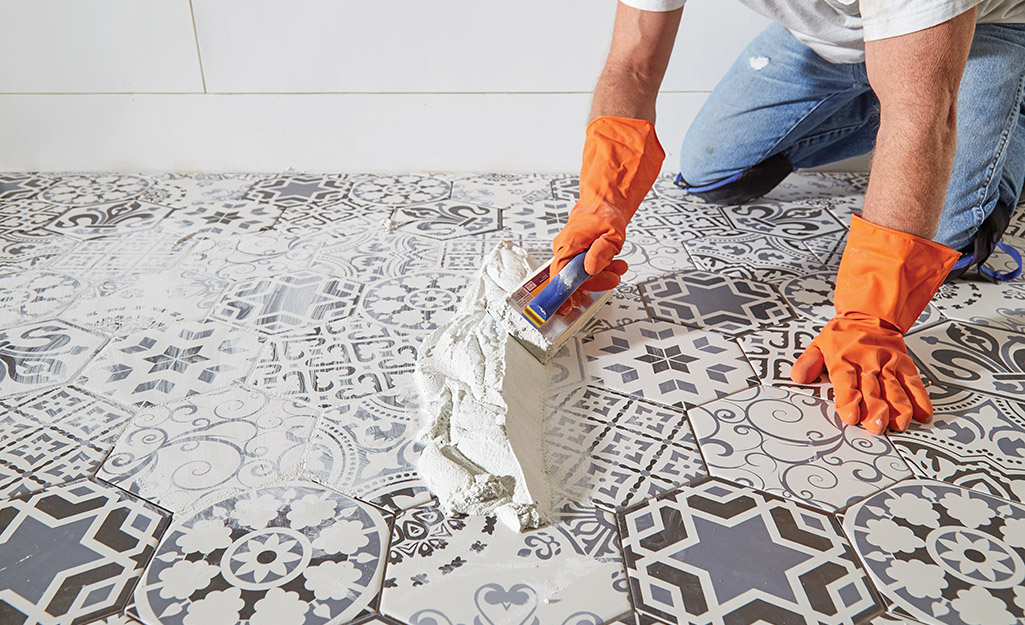
Tile Flooring
DIY installation of tile flooring involves precise measurement, cutting of tiles, application of adhesive, and meticulous installation techniques to create a visually appealing and durable tile floor.
The first step in the installation process is to accurately measure the room to determine the quantity of tiles required.
Once the measurements are completed, the tiles need to be cut to fit around edges and corners, using a tile cutter or wet saw for precise cuts.
Applying adhesive evenly using a notched trowel ensures proper bonding between the tiles and the subfloor.
Afterwards, carefully placing each tile and using spacers to maintain consistent grout lines leads to a professional-looking tile installation.
What Are The Tools and Materials Needed For DIY Flooring Installation?
DIY flooring installation requires a range of tools and materials, including measuring tools, cutting tools, installation equipment, and essential supplies, to facilitate the successful execution of the project.
Measuring tools such as a tape measure and T-square are essential for accurately assessing the space and ensuring precise cuts. Cutting implements like a power saw or a sharp utility knife are vital for shaping the flooring material.
Installation equipment like a hammer, pry bar, and a tapping block aid in securely fitting the flooring. Necessary supplies such as underlayment, adhesive, and transition strips are crucial for a professional-looking and durable installation.
Measuring Tools
Accurate measuring tools are essential for DIY flooring installation. Precise measurements support effective prep work and facilitate the proper layout of the flooring materials for optimal results.
When it comes to installing flooring, using measuring tools like tape measures, T-squares, and chalk lines is essential. These tools help ensure that the flooring materials are cut to the correct dimensions, reducing waste and ensuring a seamless fit.
Accurate measurements are crucial for planning the layout of various flooring types, such as hardwood, laminate, or tile. By taking the time to measure precisely, DIY enthusiasts can achieve a visually appealing and structurally sound finish for their flooring installation.

Cutting Tools
Quality cutting tools are crucial for DIY flooring installation. They enable precise cutting techniques and efficient utilization of materials, resulting in a seamless and professional outcome.
Using cutting tools is essential for achieving clean and accurate cuts, resulting in a visually appealing flooring finish. They also assist in material handling, allowing DIYers to work with various flooring materials, such as hardwood, laminate, or tile, while maintaining precision.
Properly using cutting tools can also reduce wastage, ensuring supplies are used efficiently, ultimately saving time and money during installation.
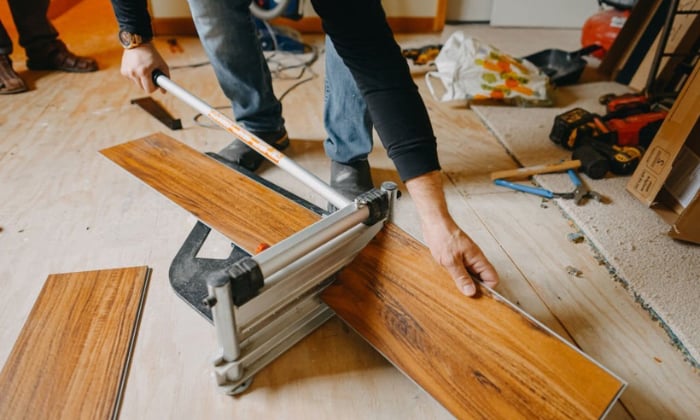
Installation Tools
Specialized installation tools play a key role in DIY flooring installation, enabling efficient techniques, essential tips, and helpful tricks to achieve professional and durable results.
When it comes to installing laminate flooring, having the right tools is crucial. These tools provide precision and accuracy in cutting, ensure proper positioning, and aid in securing the flooring material in place.
Some essential tools for laminate flooring installation include a laminate floor cutter, tapping block, pull bar, and knee pads. These tools not only make the installation process easier, but also help achieve seamless joints, prevent damage to the flooring, and create a comfortable working environment for the installer.
Investing in these tools is essential for any DIY enthusiast, as they not only simplify the installation process, but also contribute to the longevity and quality of the installed flooring.
Materials and Supplies
Various materials and supplies, such as adhesive, nails, screws, and specific flooring materials, are essential for DIY flooring installation. These tools and supplies are crucial for ensuring the successful execution of different types of flooring projects.
When it comes to hardwood flooring installation, having the right adhesive and fastening tools is crucial for a secure and durable result. It’s important to carefully choose and use these tools to achieve a professional and long-lasting finish.
For laminate or vinyl flooring, underlayment and a tapping block are necessary to ensure a smooth and secure installation. These tools help to properly align and secure the flooring, resulting in a professional and polished look.
When working with tile, it’s important to have the appropriate adhesive, grout, and spacers to achieve a professional and long-lasting finish. These tools and supplies are crucial for ensuring that the tiles are properly secured and aligned, resulting in a beautiful and durable flooring.
Remember, each type of flooring material requires specific tools and supplies, so make sure to be well-prepared before starting the installation process. This will not only ensure a successful installation but also save time and effort in the long run.
What Are The Steps For DIY Flooring Installation?
The DIY flooring installation process involves several key steps, including preparing the subfloor, acclimating the materials, laying out the flooring, cutting and installing the materials, and finishing with meticulous attention to maintenance for longevity.
Proper subfloor preparation is crucial for ensuring a flat and stable base for the new flooring. This involves cleaning the subfloor, repairing any damage, and ensuring it is level.
Material acclimation is essential to allow the flooring to adjust to the humidity and temperature of the room, preventing warping or buckling later on. Next, laying out the flooring in the desired pattern and making accurate cuts for a precise fit is essential for a professional-looking finish. During installation, attention to detail and following manufacturer’s instructions is key. Regular maintenance such as cleaning, spot treatments, and proper care will preserve the beauty and durability of the new flooring.
Preparing the Subfloor
Properly preparing the subfloor is a critical initial step in DIY flooring installation. This involves precise measurements, essential tools, and effective prep work to create a suitable foundation for the flooring materials.
This preparation process ensures that the flooring materials adhere properly, preventing issues like uneven surfaces, squeaks, or premature wear. Accurate measurements allow for the necessary adjustments and cuts, while essential tools such as leveling compounds, moisture barriers, and sanders help in achieving a smooth and durable subfloor.
Thorough prep work, including cleaning, repairing, and leveling, is essential for the long-term performance and aesthetics of the installed flooring. Taking the time to prepare the subfloor meticulously can significantly impact the overall success and longevity of the DIY flooring project.
Acclimating the Flooring Materials
Allowing the flooring materials to acclimate to the environment is a crucial step in DIY flooring installation. This ensures that hardwood, laminate, vinyl, tile, and carpet materials adjust to the ambient conditions before installation.
This acclimation process is essential as it helps to prevent issues such as buckling, warping, and gaps that can occur if the materials are not properly acclimated.
Hardwood flooring, for example, can expand or contract with changes in humidity, which is why acclimating it to the indoor environment helps to minimize any potential problems. Similarly, laminate, vinyl, tile, and carpet all have specific temperature and humidity requirements, and acclimating them allows for a more stable and long-lasting installation.
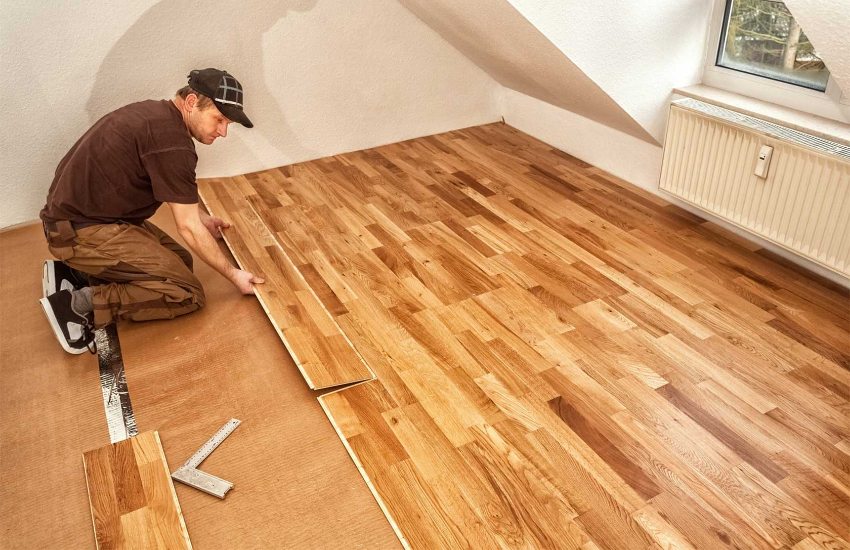
Laying Out the Flooring
Carefully laying out the flooring materials is a fundamental step in DIY flooring installation. This involves precise measurement techniques, strategic placement, and efficient material layout to achieve the desired aesthetic and functional results.
Proper measurement is crucial, ensuring accuracy and minimizing material wastage. Strategic placement involves starting from the center of the room and working outward for balanced aesthetics.
Considering material layout patterns, such as staggered or herringbone, can enhance the overall look and feel of the flooring. Carefully planning the layout also involves accounting for any obstructions or irregularities in the space to ensure a seamless installation.
Cutting and Installing the Flooring
The cutting and installation phase in DIY flooring installation involves employing effective techniques, useful tips, and essential tricks to ensure precise and professional execution of the materials for a seamless and durable outcome.
To achieve accurate cutting, it’s crucial to understand the proper measurements and tools needed. Before cutting, it’s important to let the flooring materials acclimate to the room’s temperature and humidity levels.
Using a sharp blade or saw can make the cutting process smoother, resulting in clean and precise cuts. Additionally, following proper installation techniques, like starting from the center of the room and working outwards, can contribute to a professional finish.
Don’t forget to use underlayment and adhesive suitable for the specific flooring type to enhance durability and longevity of the installation.
Finishing and Cleaning Up
The final phase of DIY flooring installation involves meticulous finishing techniques and thorough cleaning up, focusing on maintenance aspects to preserve the quality, durability, and aesthetic appeal of the newly installed flooring.
This stage plays a crucial role in ensuring that the flooring not only looks visually appealing but also stands the test of time.
Implementing proper finishing techniques can enhance the durability and resilience of the flooring, while thorough cleaning removes any excess adhesive, grout, or debris, ensuring a smooth and seamless surface.
Incorporating the appropriate maintenance practices prolongs the lifespan of the flooring, reducing the need for frequent repairs and replacements.
Frequently Asked Questions (FAQs)
What materials do I need for a do it yourself flooring installation?
For a do it yourself flooring installation, you will need the flooring material of your choice (such as hardwood, vinyl, or tile), underlayment, adhesive or nails, a saw, measuring tools, and safety equipment (such as knee pads and goggles).
How do I prepare my floor for a do it yourself flooring installation?
Before beginning the installation, make sure to remove all furniture from the room and thoroughly clean the floor. Check for any imperfections or uneven areas and use a self-leveling compound if necessary. It is also important to acclimate the flooring material to the room’s temperature and humidity before installation.
Do I need any special skills or experience for a do it yourself flooring installation?
While it is helpful to have some basic DIY skills and experience, many flooring materials now come with easy-to-follow installation guides that make the process accessible for beginners. However, it is important to carefully read and follow all instructions to ensure a successful installation.
What are the benefits of doing a flooring installation myself?
Doing a flooring installation yourself can save you money on labor costs and give you a sense of accomplishment. It also allows you to have complete control over the process and make any necessary adjustments along the way.
How long does a do it yourself flooring installation typically take?
The time it takes to complete a do it yourself flooring installation can vary depending on the size of the room and the type of flooring being installed. It is best to allow yourself plenty of time and not rush the process to ensure a high-quality finished product.
Are there any specific safety precautions I should take during a do it yourself flooring installation?
Yes, it is important to wear protective gear, such as goggles and knee pads, to prevent injuries while working. It is also recommended to have good ventilation in the room and to handle tools and materials with caution to avoid accidents.